Bypassing HWID
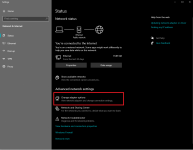
1.2 In the window that opens, go to "Configure adapter settings".
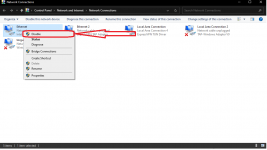
1.3 In the Network Connections panel, right-click on the active Ethernet connection and select "Disconnect".
Step 2: Clear Steam traces.
2.1 Press WIN+R
2.2 Enter command "regedit".

2.3 Press CTRL + F
2.4 On the window that appears type in "Valve" and select the search criteria for "Keys" only.
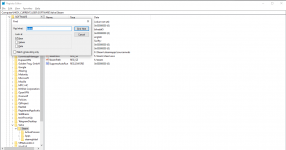
Delete the found folder
Proceed in the same way for the keyword "Steam".
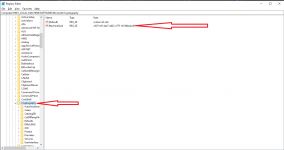
2.5 Go to HKEY_LOCAL_MACHINE\SOFTWARE\Microsoft\Cryptography
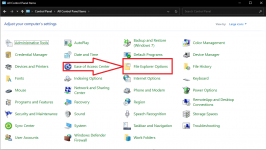
3.3 Then go to "View".
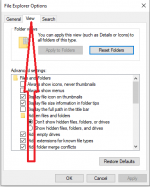
3.4 Then enable "Show hidden files, folders, drives" option.
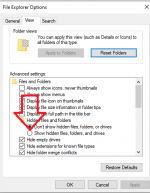
3.5 Browse to the root folder of Steam
3.6 Locate the AppCache, Userdata and Config folders

3.7 Delete these folders
3.8 Find and delete SSFN files
In order to bypass hardware ban, you need to change your MAC address, drive serial number, and do a registry cleanup.
Step 1: Preparation.
In this step we need to disconnect your active Internet connection for the next two steps. In case you are connected to the network via Wi-Fi, proceed to step 1.4.
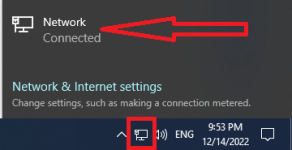
1.1 Click on the Network icon in the system tray and open the active connection panel.

1.2 In the window that opens, go to "Configure adapter settings".

1.3 In the Network Connections panel, right-click on the active Ethernet connection and select "Disconnect".

Step 2: Clear Steam traces.
2.1 Press WIN+R
2.2 Enter command "regedit".

2.3 Press CTRL + F
2.4 On the window that appears type in "Valve" and select the search criteria for "Keys" only.

Delete the found folder
Proceed in the same way for the keyword "Steam".
2.5 Go to HKEY_LOCAL_MACHINE\SOFTWARE\Microsoft\Cryptography

2.6 Right-click on MachineGuid > Change.
2.7 Open https://www.guidgen.com/ and copy the displayed code
2.8 Paste copied code instead of the old one
2.9 Click OK, close the registry editor
Step 3: Clean up Steam.
3.1 Go to the Control Panel
3.2 Then go to "Explorer Settings".

3.3 Then go to "View".

3.4 Then enable "Show hidden files, folders, drives" option.

3.5 Browse to the root folder of Steam
3.6 Locate the AppCache, Userdata and Config folders

3.7 Delete these folders
3.8 Find and delete SSFN files
Step 4: Change Disk Serial Number
4.1 Download Hard Disk Serial Number Changer utility - Click
4.2 Launch this utility as an Administrator.
4.3 Select and change digits in the serial number for each drive.
CHANGE LAST 4 OF EACH DRIVE'S SERIAL NUMBER TO ANY 4 DIGITS.
Changed digits should not be identical in any way to the serial numbers of different drives, each drive should have an individual set of numbers.
Hard disk serial number changer (Password file: 123)
4.4 Reboot your computer after the above steps.
4.5 Reconnect your Internet connection via Ethernet connection (see step 1.3) or disable "Airplane mode".
Step 5. Change the MAC address. This step is pretty simple, first we need to download TMAC software - Click
Tmac software
5.1 Install the program.
Installing program
5.2 Run the program as administrator.
5.3 Change the MAC address on each connection.
Changing mac address
5.4 As you may notice in some cases, when changing the MAC address of one of the connections the program may cause an error, in which case we just skip this connection and move on to the next one.
After completing all the steps, restart your PC.
Also after completing step 5, you will encounter following errors when starting Steam:
1. Click on the "Ignore" button.
2. Click on "Install Service".
Steam Error
Steam service error
Last edited:

